Showing posts with label chocolate. Show all posts

Monday, 28 May 2012

Coffee chocolate ripple ice cream (for Bloggers Scream for Ice Cream)

For a while now I've been wanting to take part in Kavey's Bloggers Screan for Ice Cream, which makes me drool every month. Last month's theme was sorbet and I was really intending to make the effort but time got the better of me. This month, the theme is chocolate, and while I love chocolate I actually really dislike chocolate ice cream (weird, I know!) so I had to think of some sort of ice cream that involved chocolate in some other way. And it couldn't be stracciatella because I've done that before
What I came up with is rather in keeping with a theme that's been prominent on my blog over the last couple of weeks - coffee! But this has nothing to do with the other challenge I'm taking part in, this is strictly for BSFIC. I love coffee ice cream but it's really difficult to find in the shops, and when you do find it usually it's really not very nice at all (unless you happen to be in Italy), so again the diet has gone out the window and I've made some coffee chocolate ripple ice cream.


I use a Magimix Le Glacier 1.5L machine, having upgraded from the Kenwood 1.1L I used to have because I wanted a bigger capacity, but I think the mix will be fine for a smaller machine. I would kill for an ice cream machine with a built-in freezer but the budget unfortunately won't stretch that far! This recipe comes in two parts, but both parts are very easy so please don't feel put off. 

 
Big one for the ice cream, little one for me.

COFFEE ICE CREAM

Ingredients:

250ml semi skimmed or whole milk
Approx 150ml strong black coffee (I used a whole six-cup Bialetti pot)
4 egg yolks
80g caster sugar
1 vanilla pod
1 tsp cornflour
300ml whipping cream

Before you start, fill the sink with cold water and add some ice cubes.

Put the milk, coffee and the seeds from the vanilla pod in a saucepan, whisk together and heat until just before it boils.

Meanwhile, whisk together the egg yolks, sugar and cornflour in a big bowl.

Pour the hot milk/coffee mixture onto the egg mixture slowly while constantly whisking (if you pour it all in too quickly it will cook the eggs!), and then return this mix to the saucepan. Heat it gently while stirring constantly until it thickens up enough to coat the back of a wooden spoon (don't boil it, or it will curdle). What you have just made is a thin coffee custard. Pour it back into the bowl you used to whisk the eggs, add the cold whipping cream and whisk it in, and stand this in the sink full of icy water - this will stop the custard cooking. Leave it there till it cools down enough to go in the fridge, and then chill till it's really cold - preferably overnight. 

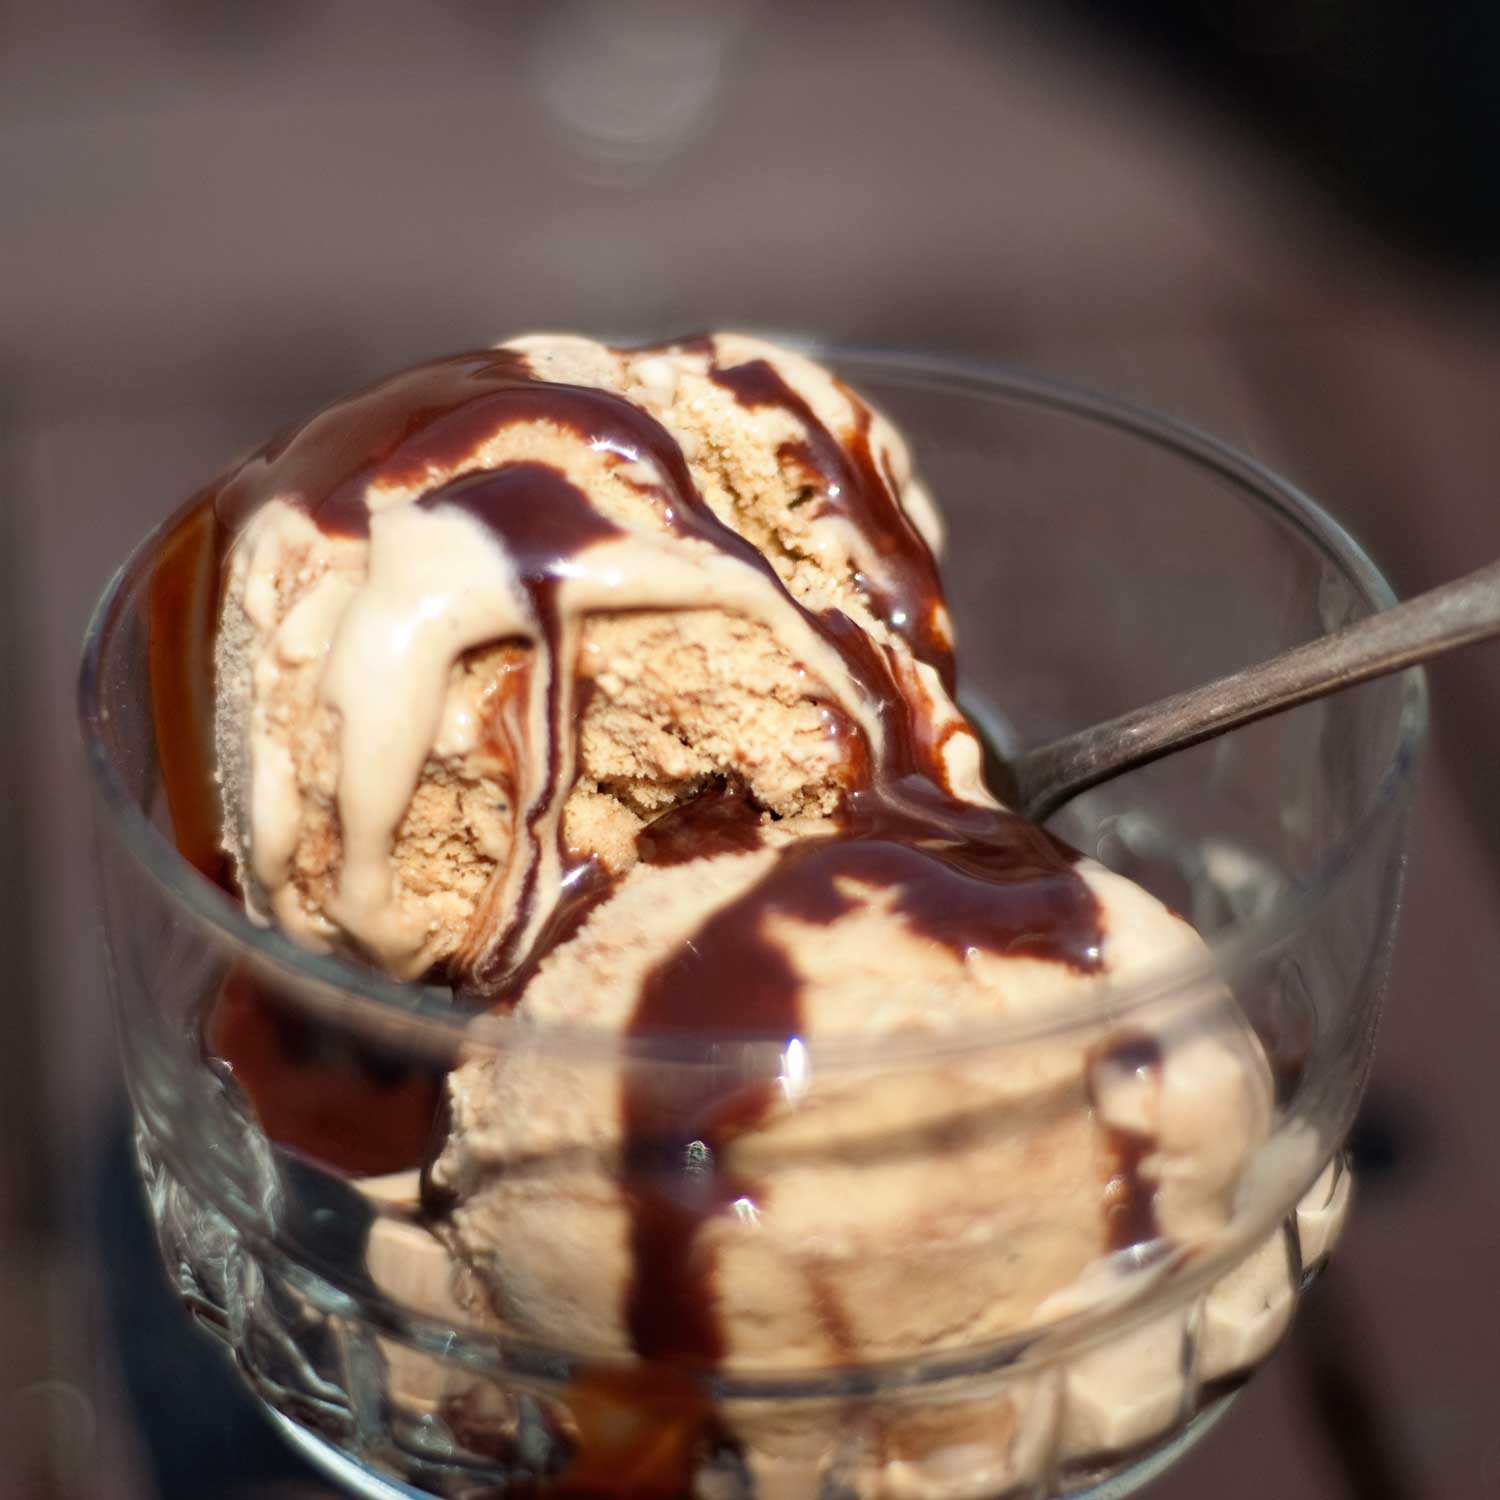
With some extra sauce drizzled over the top...

Meanwhile...

CHOCOLATE SYRUP (makes 2 jam jars full)

Ingredients:

1 cup of cocoa powder
2 cups of sugar
2 cups of water
2 tsp vanilla extract
Pinch of salt
1 tsp cornflour, mixed together with 2 tsp cold water

Sieve the cocoa powder into a small saucepan. Add the sugar, salt, water and vanilla and whisk it all together. Bring to the boil and simmer for a couple of minutes. Pour in the cornflour mixed with water, and whisk it in - the mixture will thicken up. Take off the heat, pour into jam jars and let cool before putting in the fridge until completely cold.

Now churn your ice cream in your ice cream machine, or if you normally just freeze it in a tub and take it out every few hours to give it a mix around, that's fine too.

When it's ready (it should still be quite soft), scoop it out into a tub and do the next bit by hand. Add a few tablespoons of the chocolate syrup to the tub and swirl it all around with a fork. Don't mix it in completely, you want to see a nice chocolatey ripple going through the ice cream. You can add as much syrup as you want.

Now stick the tub in the freezer and leave it there for another couple of hours until it's firmed up enough to scoop out and eat!


I'm sorry this recipe looks quite long, but honestly it really is very easy and the bits where you're actually involved (ie making the custard and making the syrup) probably take no more than 15 minutes for both - the syrup takes five minutes at most and is so incredibly versatile that it's worth having some in your fridge at all times to drizzle over ice cream, swirl through yoghurt or, best of all, to add a few spoonfuls to a glass of cold milk for some instant chocolate milk that's as good as the stuff you used to get when you were a kid :)

Thanks to Kavey for running such a great blog challenge, I can't wait to see everyone's recipes.

Sunday, 27 May 2012

Sue's chocolate chip coffee muffins

This post is dedicated to my lovely friend and workmate Sue. When I first told her about Lavazza's Coffee,Set, Match challenge, she immediately decided that I needed to make some coffee chocolate chip muffins, and for weeks afterwards she regularly harangued asked me when they would be forthcoming. 
 

Sue is such a sweetie that I would hate to disappoint her, so coffee chocolate chip muffins were made and delivered to work, and while a few of them were shared with other workmates, most of them accompanied a gleeful Sue home - they were most definitely enjoyed! (I may or may not have eaten one for breakfast myself.)


I decided to use some cupcake cases I found in Poundland. I really love the 1960s style pattern on these, but unfortunately you do tend to get what you pay for and during the baking process they soaked up a lot of grease and went a bit see-through - not a good look. I'm on the lookout for some nice Jubilee-style cupcakes but I live miles from the nearest Lakeland - has anyone seen any good ones in the supermarkets?

Not the best quality but what a fab pattern.

Anyway, here's the muffin recipe. If you have unexpected visitors or a cake sale you've forgotten about till the last minute, these are ideal as you can be taking them out of the oven half an hour after deciding to make them! And like my fudge recipe, this is very adaptable. Leave out the coffee, use white chocolate, and add a big handful of frozen raspberries (don't defrost them first) for a lovely summery treat.

Ingredients:

280g self raising flour
1 tsp bicarbonate of soda
Good pinch of salt
90g caster sugar
1 egg
250ml plain yoghurt
90ml semi skimmed or whole milk
90ml vegetable oil
1 tsp vanilla extract
1 shot of espresso (I used a Lavazza Caffè Crema Lungo Dolcemente pod)
100g chocolate, chopped (I used milk chocolate as I wanted a bit of sweetness to counterbalance the coffee, but dark would be fine, as long as it's a fairly low cocoa content)

Preheat the oven to 225ºC and get your muffin tin ready with paper cases.

Sieve the flour, bicarb and salt into a large bowl (or tip it all in and give it a whisk to get rid of any lumps).

Beat the egg and sugar together in a big measuring jug. Add the yoghurt, milk, oil, espresso and vanilla, and give it all a really good mix with a fork or small whisk.

Pour the wet stuff into the dry stuff, and fold it all together with a big spoon. Don't overmix - you want it to stay lumpy. Finish by folding in the chopped chocolate.

Divide the mixture between the paper cases (you should get 12, but if you use smaller cases like I did you might end up with 14 or 15 - if so, and you can't fit two tins in the oven, you could bake a couple in silicone cases which will hold their shape in the oven without needing to be placed into a muffin tin).

Place in the oven, immediately turn the heat down to 200ºC, and bake for 20 minutes. Remove the muffins from the oven, let them cool for a few minutes till you can handle them, and then put them on a wire rack to finish cooling. They are lovely eaten while still a bit warm, as the chocolate chunks will still be melty and gooey!


Don't forget - you can win prizes  from Lavazza too!  Look out for instant win details on promotional cups of takeaway Lavazza coffee, or enter online HERE.

Prizes include pairs of tickets to Wimbledon, Lavazza A Modo Mio Favola Plus Wimbledon Limited Edition coffee machines and exclusive sets of espresso cups created especially for the tournament. 

 
1950s Royal Doulton espresso cup which is one of my favourites


Sunday, 25 September 2011

We Should Cocoa - Happy Birthday!

Chele is hosting this month, and it's also We Should Cocoa's First Birthday! So very appropriately she chose the theme of "a chocolate masterpiece fit for a first birthday party".


Now when I was a kid, my birthday parties were fantastic, because my mum put so much effort into them. But I never had a chocolate birthday cake - back then birthday cakes were always plain sponge cakes in the shape of your age, covered in white buttercream with pink piping for girls and blue piping for boys, and crushed nuts round the sides. EVERYONE had a birthday cake just like that, and I absolutely hated them.

However what I did have at my birthday party every year, and what I absolutely adored, was a veritable mountain of chocolate rice crispie cakes. I bet if you're reading this in the UK you had them too (do they have rice crispies outside the UK?). My mum used to let me "help" make them, and even back then I was happiest with a wooden spoon in my hand.


Anyway, as I do love a bit of nostalgia, here's my rice crispie cake mountain. It's only a small mountain (more of a gentle hill, really) as there are only two of us here to eat them all up. But one day in the nearish future, hopefully I'll have a little mini baker of my own I can pass the wooden spoon along to, and I'll be able to make proper rice crispie mountains just like my mum used to :)


A big HAPPY BIRTHDAY to We Should Cocoa and a huge THANK YOU to Chele and Choclette!


Oh and I've had a bit of a funny month, from technical issues to my dad being in hospital to me changing jobs and I just haven't had time to be baking, let alone photographing it and writing blog posts, but now things have thankfully settled down so I should be back into the swing of things. And I'm still wading through weeks worth of emails so if you've sent one and I haven't replied, sorry but I will!


Tuesday, 24 May 2011

We Should Cocoa - chocolate swiss roll


For this month's We Should Cocoa, hosted by Chele at the Chocolate Teapot, the theme was a chocolate roulade/swiss roll. I knew immediately what I wanted to do, and headed straight for Peyton & Byrne British Baking. I adore this book, I know I've said it before, but it's just so pretty and pastel and... well, English, and the photography is lovely and the recipes are lovely and it's all just lovely. Go and buy it, I'm not giving you the recipe for this chocolate swiss roll, you'll just have to buy the book if you want it.

Anyway I've made a chocolate swiss roll and filled it with vanilla buttercream and raspberry jam (seedless/bitless so my husband, who is afraid of fruit, will actually eat it).


It cracked a bit on rolling but that was my own fault for letting it cool a bit too much before rolling it. It's a really nice, very simple recipe though, and very quick to make.


I've already seen a few other entries for this month's We Should Cocoa and most of them are a lot more elaborate and impressive than mine, but I do love an old fashioned swiss roll so I'm really quite happy with how this one turned out :)

Good news! My poor dead Macbook (RIP) has been replaced by the insurance company. I now have a shiny new one that's absolutely lovely and I've managed to install Photoshop after much faffing about, so hopefully my posts will be a bit more prolific from now on.

Sunday, 22 May 2011

Millionaire's shortbread. Better than birthday cake.


Yesterday was our friend Mike's 40th birthday, and his missus organised a surprise party for him at our local pub, complete with live band, helium balloons and a barbecue with the best fried onions EVER. I knew she'd ordered him a birthday cake, but I couldn't let a 40th birthday go by without offering the birthday boy some sort of baked product. Obviously. So knowing that Mike is a fan of millionaire's shortbread, I brought home a huge baking tin from work and made him a massive batch of it, all for himself :)

The recipe I use for this yummy treat comes from the Hairy Bikers Mums Know Best cookbook (the first one), which my lovely husband managed to get Dave and Si to sign for me when they visited his office. It's a great book, full of the sort of food your mum/granny used to make, real good family grub. It's worth buying just for this recipe and one for spaghetti carbonara, but really every recipe in it is a winner.


I doubled the quantities and filled my massive tin, but normally I make it in a Lakeland brownie pan which measures 34x20cm and it's just about perfect. I use different methods to make the shortbread base and caramel topping than the recipe states - my way is quicker and easier!

Ingredients:


Shortbread base:


125g butter

50g caster sugar

175g plain flour


Preheat the oven to 190 degrees C. Line your tin with baking parchment.
Put all the ingredients for the base into a food processor and turn it on until you get a sandy mixture. Pour this into the tin and press it down really well, making sure you get into the corners. (If you have no food processor, you can make sure your butter is softened and just mix it all together by hand). Bake for 20 minutes. It shouldn't really take on much colour, and should still be quite soft on top (it will harden as it cools). Leave to cool completely.

Caramel topping:


397g condensed milk

50g butter, cut into small pieces
50g soft brown sugar


Put all the ingredients into a large microwaveable bowl, and microwave on full power for around 7 or 8 minutes. Take it out every couple of minutes and give it a whisk. It will boil quite furiously and will rise up in the bowl (this is why you want a big bowl - but it's perfectly normal). When the caramel is ready, it will be thickened and fudgy-looking. DO NOT be tempted to dip a finger in to taste it, you will get a nasty burn! Pour this over the shortbread base, and let it set in the fridge.


When it's set firmly, melt 150g dark chocolate and pour all over the top. Leave to set again before cutting into squares. I like to melt a little white chocolate, drizzle it in lines
over the dark chocolate and pull a skewer through it to make a feathery pattern.

Sorry for the lack of better photos, I had to snap these very quickly as I was already late for the party! I can tell you that the recipient was very happy to receive a huge tin full of this stuff :)

Sunday, 27 March 2011

Random Recipe - chocolate ginger brownies from Martha Stewart's Cookies


Last month I missed out on taking part in the Random Recipe challenge run by Dom at Belleau Kitchen, and this month I was determined I'd manage it. However illness and general beingtoobusyness meant that today being the last day to get your entries in, and me being off to London at about 10am, I had to get up disgustingly early to make my recipe. I'm so dedicated!


So the rules were that you had to count along your bookshelf till you reached the eighteenth book and that's what you had to use. Number 18 for me was Martha Stewart Cookies, a gorgeous book that sits criminally ignored on my shelf because I despise using cups to measure out ingredients. Seriously - what's wrong with a good old weighing scale? I also have her Cupcakes book, a lovely book called Swedish Cakes and Cookies and Dorie Greenspan's Baking From My Home To Yours, all of which use cups which really puts me off using them. I really must get over myself.


Anyway I opened the book at a random page, which had a recipe for chocolate ginger brownies. Lovely, I love anything ginger, and while I know I've done a brownie recipe on the blog before, that was a low fat one. This definitely isn't. And it's also a nice quick and easy one.

Recipe from Martha Stewart Cookies, adapted very slightly.

Ingredients:

3oz plain chocolate, chopped
4 oz butter
1 tsp grated fresh ginger (I used a jar of minced ginger)
1/2 tsp ground ginger
1/2 tsp ground or freshly grated nutmeg
1 clove, ground up in a pestle & mortar
1 cup sugar
2/3 cup plain flour
1/4 cup cocoa powder
2 eggs
1/2 tsp vanilla extract
1/4 tsp salt

Line an 8" square tin with baking parchment, letting the ends overhang the tin. Preheat the oven to 160ºC.

Melt the butter and chocolate together in the microwave - take care not to burn the chocolate. Stir in everything else. Pour into the prepared tin and bake for 30-35 minutes until set. Leave to cool in the tin for a few minutes, then lift out using the parchment and cool completely on a wire rack before cutting into squares.


I'm really looking forward to seeing what everyone else has come up with! I got an easy recipe but I know other people won't have, so it'll be very interesting.

The few things I have cooked from this particular book have all turned out very well. The lemon squares in particular were gooey and gorgeous and definitely worth making again. And these brownies are fantastic. So I'm determined to stop hating cups and make more of Martha's lovely goodies.


Oh and by the way, I have had a very, very unsuccessful week of baking. I made some Viennese biscuits that went a bit wrong, some Cornish fairings (little spicy biscuits) that I overcooked and consequently went absolutely rock hard and inedible, and yesterday I made a ginger cake that stuck horribly to the (really well greased and floured) tin. Luckily all the disasters happened at home and not at work (although last week I did forget to put the eggs in a carrot cake, the staff ate the resulting disaster with spoons) but it's a bit disheartening. I hadn't had a baking disaster in years and then three happened within the space of a couple of days. It almost made me go out and buy a cake from the supermarket...

The disastrous ginger cake, with the offending tin

Sunday, 6 March 2011

We Should Cocoa - lime and coconut madeleines with white chocolate

A blog I've been reading for ages called Chocolate Teapot runs a monthly blog event called We Should Cocoa, where you have to make something involving chocolate (well, duh) but also another ingredient that changes every month. Previous months have been caramel (wish I'd had my blog in time to enter that one!) and raspberries, among other things, and this month's ingredient is limes.


Well, I love limes. Love them. And even more so when they're paired with coconut, and even more than that when there's some white chocolate involved. So this was a no-brainer. I would make some white chocolate madeleines. Because madeleines are so pretty, they make just having a cup of coffee seem like a party!


My madeleine tins are from Lakeland, and they don't seem to give a very defined shape. I also have a silicone one from House of Fraser which is a much nicer shape, but the silicone just doesn't seem to give the cakes the nice colour that a metal baking tin does, so they come out looking a bit pale. I've used the Lakeland tins for these, next time I make madeleines I'll use the silicone tin to show you the difference.

Ingredients:

60g plain flour
1 tsp baking powder
60g caster sugar
2 eggs
50g butter (I use salted; if you're using unsalted then add a pinch of salt in with the flour)
20g dessicated coconut (or 30g if you'd like them a bit more coconutty)
zest of 2 limes
About 25g white chocolate

Melt the butter and leave to cool a bit. Whisk the sugar, eggs and lime zest together, preferably with an electric hand whisk or mixer, until they have increased in volume, are very pale and thick and the mixture leaves a ribbon-like trail.

Sift in the flour and baking powder and fold it in gently. Then drizzle over the butter and fold that in gently too, and finally the coconut. Really try to be gentle so as not to knock the air out of the mixture. Stick the mixture in the fridge for an hour or two.


When you're ready to bake the madeleines, preheat the oven to 210ºC. Lightly grease a 12 hole madeleine tin. I use a low fat cooking spray. Fill each hole about two thirds full (I got 14 madeleines out of this mixture, so you might have to bake in two batches unless you've got two tins).

Bake for about ten minutes, or until they are golden and springy when you press lightly on them. They should easily fall out of the tin. Cool on a wire rack.

When cool, melt the white chocolate. BE CAREFUL, especially if you're using a microwave, because white chocolate burns really easily and burnt white chocolate is disgusting. Pour the melted chocolate into a plastic freezer bag and snip off the corner, or make a piping bag from baking parchment if you prefer, and drizzle the chocolate all over the madeleines.


Perfect with a cup of coffee! These are really best eaten on the day they're made.

I'm starting my new job tomorrow, and I can't wait! Wish me luck :)


Friday, 4 March 2011

Brilliant brownies

It just so happens that out of all the brownie recipes I've tried over the years (and there have been a LOT), one of my very favourites happens to be a low fat offering from my Weightwatchers baking book. It couldn't be called healthy, no way, it's absolutely full of sugar, but I think the thing that makes it so nice and gooey is the applesauce it uses instead of fat!


In some of my foodie magazines this month, I've seen a Hellmans ad that gives a brownie recipe using mayonnaise! I have to say, that just sounds icky. But applesauce is different. I think it's genius. Please give this a try, it's so worth it. They are rich and dark and gorgeous. It's also super easy, you can have it in the oven in ten minutes.

75g plain flour

1 tsp baking powder
1/2 tsp bicarb

50g cocoa powder (I like Bourneville)

nice big pinch of salt

1 egg

2 egg whites (use the yolks for something else)

175g caster sugar
6 tablespoons apple sauce

2 tablespoons sunflower/vegetable/rapeseed oil

2 tsp vanilla extract
15g chopped nuts (I used walnuts, but use whatever you like)

Preheat the oven to 180ºC. Spray an 8"/20cm square tin with low fat cooking spray, or grease it lightly with butter.


Put the flour, cocoa, salt, baking powder and bicarb in a bowl and whisk it all together (saves having to bother sifting it).
In another bowl, whisk the egg, egg whites, sugar, apple sauce, oil and vanilla. Add the wet stuff to the dry stuff and fold it all together gently. Don't overmix it. A few lumps are fine.


Add the mixture to the cake tin, sprinkle the nuts on top, and bake until just set - there should still be a bit of a wobble. It'll take about 25 minutes but check after 20. Cool in the tin for 15 minutes and cut into pieces however big you like them - I got 8 pieces, but mine were quite big.

If you like, you could add the zest of two oranges and leave out the nuts, for chocolate orange brownies. Or you could add more nuts into the actual mixture itself, or add some white chocolate chips or chopped white chocolate... whatever you like really. Brownies are endlessly adaptable :)


Oh, I almost forgot, I have some good news! I have a new job and I start on Monday! I'll be working as a chef in a lovely tea room/cafe, which means that someone is actually going to pay me to bake cakes all day long. Even better, I don't have to work any evenings and I get every Sunday off! I can't wait to start!

FYF7YT2QNTU8

Tuesday, 1 March 2011

Chocolate chip & oat cookies

When I first met my husband, he used to go on about cookies called "oat crunchies" that his mother used to make. I got the recipe from her and tried it a few times but it was always "they're not quite right". It took me a long time to realise where I was going wrong. I was using butter, but his mum (like everyone else, back in the 1980s) used to use a baking margarine. It seems that people who were raised on margarine tend to prefer the taste of it. Weirdos...

(the shame)

Another time I'll share the recipe for oat crunchies, which are actually very nice even if you do break with tradition and use butter, but today I've got a recipe for the oatmeal and chocolate chip cookies I made yesterday. They should be made with butter, but since they were intended for my husband's junk food drawer at work I made them with horrible cheap baking margarine instead and he loved them. There is just no accounting for taste, is there?

110g butter, softened (or margarine if you have a 1980s Yorkshire husband like mine)

110g caster sugar

110g soft brown sugar

1 egg

2 tbsp milk

1 tsp vanilla extract (not essence! margarine is one thing, horrible cheap vanilla essence is quite another)

250g porridge oats

110g plain flour

1 tsp baking powder

1 tsp salt

100g plain chocolate, chopped


Preheat the oven to 175ºC.
Cream the butter and sugars together with a wooden spoon or in an electric mixer with a paddle attachment. Add the egg, milk and vanilla while still beating. Don't worry if the mixture looks a bit curdled.

Reduce the speed if you're using an electric mixer, and add the flour, baking powder, oats and chocolate.
Roll the dough into balls the size of walnuts and place on two baking trays, well spaced out as they'll spread a bit. No need to grease the tray. You should get about 30 balls (I got 29).


Bake for 15-20 minutes till they've started to colour - they will still be soft when they come out of the oven but will quickly firm up so they are crispy round the edges but still a bit soft and chewy in the middle. Let them sit on the trays for a minute before removing and cooling on a wire rack.
Recipe adapted a bit from Rachel Allen's Bake, which is a gorgeous book and one I use a lot.


Related Posts Plugin for WordPress, Blogger...