Wednesday 8 August 2012

An ungreedy pie

I’m still following Weight Watchers (over three stone gone now – nearly there!) and while there are many recipes that are adaptable for those of us who are shunning butter and fatty cuts of meat and even cake, one thing I am really missing is a good pie.  There is no comfort food like a proper pie with proper pastry – and that means the pastry has to go underneath the filling, not just on top.  Otherwise it’s just a stew with a lid.  My husband becomes most annoyed when we go out for a meal and he orders pie only to be presented with a stew with a lid, I’m pretty sure it would be a divorceable offence if it happened at home.


 This week I really fancied a pie, but I just didn’t have the WW points to “spend” on it.  There was also the fact that we are extremely poor this month due to having just spent more on flooring for the new house than I paid for my car three years ago!  So I had to come up with a pie that was tasty but low in propoints and only used ingredients that I already had at home.  So without further ado, here is my lovely pie; it’s meat-free but very tasty and serves four hungry people, with 11 WW points per serving.  I’m still using my iPhone to take photos as my proper camera is behind stacks of boxes and I can’t quite reach it, but bear with me.

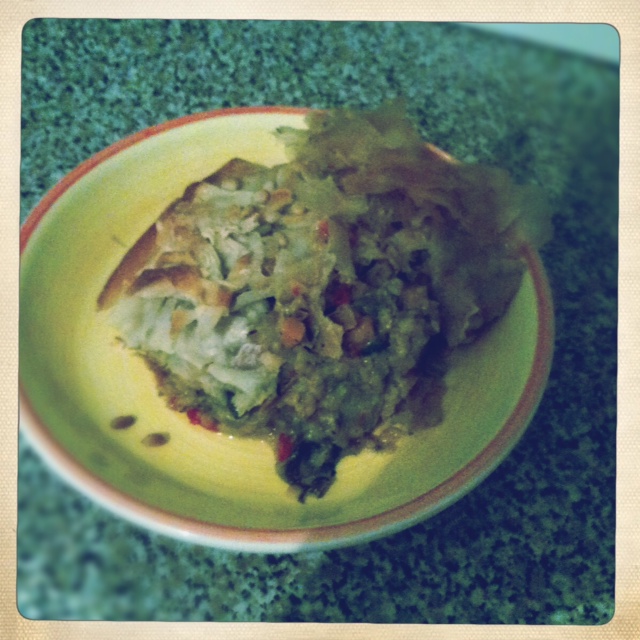
Goat’s Cheese and Lentil Filo Pie

Ingredients:

1 270g package of frozen filo pastry
Olive oil (I use an oil spray)
150g goat’s cheese
100g red lentils
1 big white onion, diced
1 big or 2 small courgettes, diced
1 pointy red pepper, diced
A handful of chestnut mushrooms, sliced finely
1 stock cube (whatever type you have is fine)
2 big carrots or 3 small ones, diced
2 cloves of garlic, crushed or sliced
2 sticks of celery, diced
1 tsp fennel seeds
1 tsp dried thyme
Pine nuts (just a few)

Spray a large saucepan with some olive oil, and fry the fennel seeds briefly over a high heat.  Turn the heat down, and add the onion, garlic, celery and carrots, and cook gently for about five minutes until the onion is translucent.  Add the red pepper, mushrooms and courgette and cook for another minute or two. 


Add the lentils, thyme and enough hot water from a freshly-boiled kettle to cover it all with a little bit extra, and crumble in the stock cube.  Bring to a simmer, cover the pan with a lid and cook for 15 minutes, by which time hopefully the lentils will have absorbed most of the water (if not, drain off any excess).  Season with salt and pepper to taste, and let the mixture cool.  When it’s cool, dice up the goat’s cheese and stir it in.

[While my pie filling was cooling, I went to my Weight Watchers meeting and learned that I had lost another 4lbs in the two weeks since I was last there – hurrah!] 


Preheat the oven to 200 degrees C. 

Now you want to find a clean tea towel, soak it with cold water and wring it out.  Use this to cover your filo pastry while you’re not working with it, because it will dry out very quickly.  A Pyrex or similar dish is great for this, but a squarish baking tin would be fine – just grease it with a little oil or butter first. 

Use four sheets of filo for the base.  Lay out the first left to right, trying to push it into the corners without tearing it, and leave the edges hanging over the baking dish.  Spray or brush with olive oil (or indeed melted butter if you are not trying to be good).  Lay out the next sheet on top of the first, top to bottom this time, and spray/brush with oil again.  Repeat these two steps. 

Now pour in your lentilly goaty cheesy filling and level the top.  Cover it up with the overhanging edges of filo, and spray with oil.  You should have about three sheets of filo left in the packet, and what I do is just scrunch them up and stick them on top so it looks spiky.  You can be tidy if you like, I’m too lazy.  Whatever you decide, make sure you oil the top when you’re done, because this will make it crisp up nicely, brown prettily and taste lovely.  Sprinkle some pine nuts over the top.


Bake the pie for 30 minutes, by which time you should smell it from several rooms away.  You can serve it with whatever you like – salad, potatoes, a big glass of wine.

I’m not claiming that this is a substitute for a proper steak and ale pie with lardy pastry.  It’s not.  But it’s an awful lot tastier than a low fat ready meal : )


Thursday 2 August 2012

Olympic gold - these cookies are winners!

This house renovation business is turning out to be a much bigger deal than I thought it was going to be.  It's been about six weeks since we got the keys, but we are still living in a building site and I'm sure it's getting worse before it gets better.  There really hasn't been a lot of time for baking... in fact there hasn't been much time for anything fun, and I'm starting to wish we'd bought a new property (and probably bankrupted ourselves in the process).  At least I'd have a living room.  And a bath.  Still, it'll all be worth it in the end... I hope! 


I did manage to find a bit of time last week to whip up some cookies for an Olympic-themed baking competition at work.  These were fairly quick to make, although royal icing can be a little bit fiddly until you've got the hang of it (judging by my piping skills, I need a LOT more practice).  I think these would be great for a child's birthday party, maybe one with the initials of each guest, or as prizes for party games.  I had hoped to enter them into this month's Calendar Cakes blog challenge, but sadly time ran away with me!

Lovely Steenbergs vanilla paste on top of the pile

I didn't manage to take any step by step photos, as I made them in a hurry very late at night (hence the hastily-snapped iPhone photos)!  But the recipe comes from The Biscuiteers book and can be found here, with apologies for the Daily Mail link. You just roll out the dough, cut out your shapes, and bake them at 170ÂșC for about 14 minutes.  If you want to use the biscuits as medals, cut a hole in them before baking.  

This recipe is really tasty - all that golden syrup makes for a delicious cookie - but I also added a teaspoon of Steenberg's Organic Vanilla Paste.  If you're read any of my previous posts, you'll know that I'm extremely fussy about what vanilla extract I use, so I was really interested to try this - it's a paste made from real bourbon vanilla pods and vanilla powder and gives a wonderful deep vanilla flavour.  Not to mention it smells absolutely divine!  It's definitely the next best thing I've tried to using vanilla pods, but a lot more convenient and cost-effective.

One of these makes mixing royal icing much easier.

When it comes to icing the cookies, you want to mix up some royal icing.  I use ready made royal icing sugar - all you need to do is add water, and give it a really good beating with a food mixer if you have one.  Make sure you keep royal icing covered when you're not using it, because it dries out very quickly.  And if you're using a piping bag, push the piping nozzle into a damp cloth when you're not working with it to stop the end drying out. Put some in a separate bowl and water it down to a runnier consistency.  Pipe the outline with the thicker icing, and then use the runnier icing to fill it in.  When it dries, you can pipe letters, numbers or whatever you like over the top.  I wrote BA (the initials of my team at work) and 2012, plus attempted to draw the Olympic rings and failed miserably as you can see!


Now for the clever bit.  When the icing is completely dry, spray the whole lot with edible gold or silver spray paint.  I used Dr Oetker Shimmer Spray, which I bought from Waitrose but I believe it's available in most supermarkets, and I think they even do a bronze version.  Spray the cookies one at a time and place them on a sheet of kitchen paper while you spray, to avoid turning your entire kitchen gold.


I bought some red, white and blue ribbon from ebay to thread through the cookies, which finished them off nicely.  If only my piping skills were better!
Related Posts Plugin for WordPress, Blogger...